Stardew Valley Beginner's Guide: Farm Layout, Early Priorities, and Time Management
A thorough beginner's guide to Stardew Valley covering farm layout choices, early-game priorities, time management, and core systems.
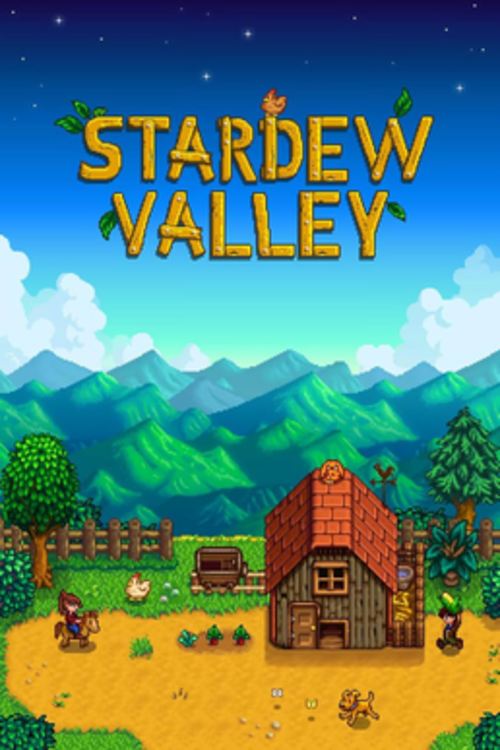
Stardew Valley has remained one of the most-played indie games for years after release, with a dedicated community and ongoing updates that keep drawing new players in. Its relaxed pace is part of the appeal, but the open-ended structure can still leave beginners unsure where to focus first — especially since some early decisions have consequences that last the entire first year.
Your First Season — What to Prioritize
Spring is your most critical season in Year 1. The game gives you 28 in-game days per season, and crops take specific days to grow. Miss the planting window early in Spring and your income for the entire first year will suffer.
Day 1-3: Clear a small planting area (about 20 tiles), buy Parsnip seeds from Pierre's shop (open Tuesday-Saturday), and plant them immediately. Parsnips take 4 days to grow and are your first real income. They're not profitable long-term, but they fund your next seed purchase. Also buy a few Potatoes — they take 6 days and produce multiple crops per harvest.
Day 13 (Egg Festival): This is the single most important event in Spring Year 1. The Egg Festival happens on Spring 13. Pierre sells Strawberry Seeds there for 100g each — and Strawberries are the most profitable crop available in Spring. Plant them immediately after buying and they'll produce multiple harvests before Spring ends. Most veterans buy as many as they can afford. Missing the Egg Festival on Year 1 is listed separately under common mistakes because it's that impactful.
Before Winter: Upgrade your Watering Can at Clint's Forge. During the upgrade (which takes 2 days), you can't water crops — do it the day before it rains (check the weather on the TV in your farmhouse each morning) so your crops don't miss water. A Copper Watering Can waters a 1x3 tile with one use instead of one tile, saving significant time daily.
Energy Management
Your character has an energy bar that depletes with every tool use — hoeing, watering, chopping wood, mining. When it hits zero, you move slowly and can't use tools. If you collapse (energy at 0 at 2am), you wake up at noon the next day having lost items from your pockets.
Priority order for energy use:
- Water your crops first each morning (they need it every day or they don't grow)
- Mine or forage if you have remaining energy
- Chop trees for wood if you have energy left after that
Energy replenishes partially when you sleep (earlier sleep = more restored) and fully with cooked food. Eating foraged items (Salmonberries in Spring, Blackberries in Fall) restores a small amount of energy and is the most accessible early source of regen.
Sprinklers are the long-term solution. A Basic Sprinkler (crafted from 1 Copper Bar + 1 Iron Bar) waters adjacent tiles automatically every morning. Once you have even a few sprinklers covering your main crop area, your energy budget for farming drops dramatically and you can spend more on mining or community center bundles.
The Mine and Combat
The Mine opens after your first farm day and has 120 floors. Reaching the bottom is a major mid-game milestone that unlocks the Skull Cavern (even harder) and a key community center bundle item.
What sword vs. club to use: For new players, the base Rusty Sword (and its upgrades) is more reliable than club weapons. Swords have a faster attack speed and more reliable knockback that lets you keep enemies at distance. Club weapons have a special AoE smash (hold attack button) that's useful but slow. Stick with sword progression until you're comfortable with combat timing.
Mine floors by resource:
- Floors 1-40: Focus on collecting Copper Ore. You need Copper to upgrade tools.
- Floors 41-80: Iron Ore becomes primary. You need Iron for better tools, sprinklers, and many crafting recipes.
- Floors 81-120: Gold Ore. Required for the Gold Pickaxe, best-in-tier upgrades, and selling.
Don't go to the mine without backpack space and healing items. Carry Salmonberries, Cheese, or other food items to restore HP. The mine elevators save your progress at every 5th floor (Floor 5, 10, 15, etc.), so if you die you restart from the last elevator you reached rather than Floor 1.
Making Friends With Villagers
Relationships are measured in hearts (max 10 for regular villagers, 14 for spouse candidates). Hearts unlock cutscenes and rewards:
- 2 hearts: recipe from certain characters
- 4-6 hearts: additional cutscenes and gifts
- 10 hearts: friendship items and (for spouse candidates) marriage option
Gifting rules:
- You can gift each villager twice per week
- Each villager has loved gifts (max affinity boost), liked gifts, disliked gifts, and hated gifts
- Gifting on their birthday gives 8x the normal affinity boost — one birthday gift equals a month of regular gifts
Check the calendar in Pierre's shop or your farmhouse to see upcoming birthdays. Giving a loved gift on a birthday is the fastest way to max out a relationship.
For max efficiency: Learn each character's loved gifts from the in-game social tab (hover over their portrait). Common universal loved gifts include Golden Pumpkin, Pearl, and Prismatic Shard, though those are end-game items. Early game: Leah loves Salad and Goat Cheese; Haley loves Sunflowers; Penny loves Diamonds and Emeralds (and Poppyseed Muffin from cooking).
Farming vs. Foraging vs. Mining Income
Understanding which activity generates income at each stage prevents the common mistake of over-investing in a system before its time.
Year 1: Crops are your primary income. A single Strawberry plant from the Egg Festival produces 3-6 Strawberries before Spring ends, each worth 120g+. A full chest of Gold-quality Cauliflower is worth a meaningful early-game sum. Mining produces resources for crafting but not direct income until gems (Ruby, Aquamarine, etc.) start dropping reliably in deeper floors.
Year 2+: Artisan goods become the money-makers. A Keg converts Wine (from crops) into Wine worth 3x the base crop value. A Preserve Jar converts crops or forage into Pickles or Jelly worth 2-3x base value. By mid-Year 2 with a dozen Kegs running, a player making Starfruit Wine can earn over 10,000g per week passively. This is when farming transitions from direct crop sale to artisan production.
Fishing: Slow to learn (the fishing minigame has a real skill curve) but provides good income from mid-game fish, valuable treasures, and is required for several community center bundles. Don't rush it, but don't ignore it either. Fishing during rainy days when your crops don't need watering is the most efficient time.
Animals and the Barn/Coop
Animals look appealing early but are a money pit in Year 1 without the right preparation.
Don't rush the Coop or Barn before Summer or Fall Year 1. Building a Coop costs 4,000g and 100 Wood + 50 Stone. A basic chicken produces an egg per day that sells for 50g. That's low return on an enormous early investment when crops are generating far better margins.
The progression: Basic Coop → Big Coop → Deluxe Coop (adds Autofeed system). Basic Barn → Big Barn → Deluxe Barn. The Autofeed system in Deluxe buildings is what makes animals actually time-efficient — without it you're hand-feeding every day.
When to invest in animals: Once you have sprinklers covering your crops (freeing up energy), a stable income from Year 2 crop production, and enough wood/stone stockpiled. Rushing animals in Spring Year 1 at the expense of better crops is one of the most common money mistakes in the game.
The Best Crops Each Season
This is the practical knowledge that separates efficient Year 1 play from struggling for gold:
Spring: Strawberries (from Egg Festival) > Cauliflower (plant before Day 6) > Potatoes. Don't waste farm space on Parsnips past the first batch.
Summer: Blueberries (multi-harvest, exceptional value) and Starfruit (if you can afford the seeds from Oasis, and only if you have Kegs to turn them into Wine). Red Cabbage is farmable and useful for one bundle.
Fall: Cranberries are the equivalent of Summer Blueberries — multi-harvest and extremely profitable for direct sale. Pumpkins have high sell value and are a loved gift for several characters. Sweet Gem Berry (from Rare Seed, available from Traveling Merchant) is the most valuable single crop in the game but takes 24 days to grow, so plant it Day 1 of Fall.
Common Beginner Mistakes
Not watching the TV for weather: The TV in your farmhouse shows tomorrow's weather every morning. Knowing rain is coming tomorrow means you don't need to water your crops that day and can use all your energy on mining or other tasks. New players who ignore the TV waste enormous energy on days they didn't need to water.
Missing the Egg Festival to buy Strawberry seeds: The Egg Festival happens on Spring 13. If you don't know to buy seeds there (the game doesn't tell you directly), you miss the most profitable Spring crop entirely. This is the single most impactful single-event mistake in Year 1.
Fishing at the wrong location: Different fish appear in different locations (river, ocean, mountain lake) and at different times (morning, afternoon, night). Using a guide to target specific fish is far more efficient than fishing randomly, especially for bundle items.
Over-investing in the Backpack before tools: The Large Pack (2,000g) is useful but upgrades to your Pickaxe and Watering Can have a higher daily impact early. Upgrade Watering Can to Copper first, then expand inventory.
Selling gems instead of saving them for bundles and gifts: Many gems (Aquamarine, Amethyst, Diamond) are required for community center bundles or are loved gifts for villagers. Check bundle requirements before mass-selling anything that might be needed.
If you enjoy relaxed building and resource games, see our best games like Minecraft roundup for more in that spirit.
Priya Anand
Hands-on PC builder and gaming hardware writer at GameInfoZone. Focused on practical, no-hype advice for everyday gamers.
Need Help With Your Gaming Setup?
From custom builds to fixing low FPS and lag, our techs can help you get the most out of your gaming PC.
Request Gaming PC HelpGet Gaming Deals & Setup Tips
Join the GameInfoZone newsletter for gaming gear deals, PC build tips, and performance guides.
Related Articles

Valorant Beginner's Guide: Agents, Roles, and Core Strategy
A thorough beginner's guide to Valorant covering agent roles, economy basics, ability usage, and performance tuning.

Rocket League Beginner's Guide: Car Control, Positioning, and Boost Management
A thorough beginner's guide to Rocket League covering car control basics, positioning, boost management, and performance tuning.

PUBG: Battlegrounds Beginner's Guide: Looting, Rotations, and Survival
A thorough beginner's guide to PUBG: Battlegrounds covering drop strategy, looting priorities, circle rotations, and performance tuning.